
写代码往往要用到 IDE,而且还要配置环境,都是挺烦人的事情。如果你有一台可以远程访问的电脑,或者服务器,那么就可以配置好环境,之后远程敲代码,这其中做的最彻底的便是 Jupyter。
在本案例中,我们将在一台装有 Ubuntu Server 系统的电脑上配置 JupyterHub 环境,如果你的系统是其他发行版,操作可能会有略微差别。
一、安装更新和依赖
# 安装更新
sudo apt update
sudo apt upgrade

# 安装 JupyterHub 所需依赖
sudo apt install python3-pip python3-dev npm nodejs
二、安装 JupyterHub
# 使用 pip 安装 JupyterHub
sudo pip3 install jupyterhub
接下来要安装 Jupyter notebook server,你可以选择传统的 Jupyter Notebook,也可以选择安装功能更现代化的 JupyterLab,这里我们选择后者。
# 安装 JupyterLab
sudo pip3 install jupyterlab

# 安装 Jupyter Notebook
sudo pip3 install notebook
三、配置 JupyterHub
要让 JupyterHub 正常运行,得先生成一个配置文件。
sudo jupyterhub --generate-config -f 配置文件路径/jupyterhub_config.py之后你可以编辑配置文件来修改配置,没有特别要求的话使用默认配置即可。
sudo vim 配置文件路径/jupyterhub_config.py四、创建服务
你也不想每次要写代码的时候还得手动启动服务吧?我们可以创建一个 JupyterHub 服务,然后让它自启动。
# 创建 /etc/systemd/system/jupyterhub.service 文件
sudo vim /etc/systemd/system/jupyterhub.service

# 按 i 进入编辑模式,贴入以下内容
[Unit]
Description=JupyterHub
After=network.target

[Service]
User=root
Environment="PATH=/usr/local/sbin:/usr/local/bin:/usr/sbin:/usr/bin:/sbin:/bin"
ExecStart=/usr/local/bin/jupyterhub -f 配置文件路径/jupyterhub_config.py

[Install]
WantedBy=multi-user.target

# 按 Esc 退出编辑,输入 :wq 按回车保存文件
启动服务,并设置为开机自启动:
sudo systemctl start jupyterhub
sudo systemctl enable jupyterhub
此时可以在浏览器打开 http://<服务器IP>:8000 看看能否正常访问。
五、排除故障
如果访问不了,先排查下服务器防火墙是否放行 8000 端口。接着检查 JupyterHub 服务的运行状态:
sudo systemctl status jupyterhub例如以下状态就说明出现错误导致服务未能正常启动:
● jupyterhub.service - JupyterHub
     Loaded: loaded (/etc/systemd/system/jupyterhub.service; enabled; vendor preset: enabled)
     Active: failed (Result: exit-code) since Wed 2023-07-05 11:21:15 CST; 6s ago
    Process: 639721 ExecStart=/usr/local/bin/jupyterhub -f /home/louis/Projects/JupyterHub/jupyterhub_config.py (code=e>
   Main PID: 639721 (code=exited, status=1/FAILURE)

Jul 05 11:21:15 s400 jupyterhub[639721]:       File "/usr/local/lib/python3.8/dist-packages/jupyterhub/proxy.py", line >
Jul 05 11:21:15 s400 jupyterhub[639721]:         self.proxy_process = Popen(
Jul 05 11:21:15 s400 jupyterhub[639721]:       File "/usr/lib/python3.8/subprocess.py", line 858, in __init__
Jul 05 11:21:15 s400 jupyterhub[639721]:         self._execute_child(args, executable, preexec_fn, close_fds,
Jul 05 11:21:15 s400 jupyterhub[639721]:       File "/usr/lib/python3.8/subprocess.py", line 1704, in _execute_child
Jul 05 11:21:15 s400 jupyterhub[639721]:         raise child_exception_type(errno_num, err_msg, err_filename)
Jul 05 11:21:15 s400 jupyterhub[639721]:     FileNotFoundError: [Errno 2] No such file or directory: 'configurable-http>
Jul 05 11:21:15 s400 jupyterhub[639721]:
Jul 05 11:21:15 s400 systemd[1]: jupyterhub.service: Main process exited, code=exited, status=1/FAILURE
Jul 05 11:21:15 s400 systemd[1]: jupyterhub.service: Failed with result 'exit-code'.
从报错信息可以看到,问题出在缺少 configurable-http-proxy 这个文件,configurable-http-proxy 是一个包,可以用以下命令安装:
sudo npm install -g configurable-http-proxy
之后重启 JupyterHub 服务即可解决。
sudo systemctl restart jupyterhub
六、登录 JupyterLab
在浏览器上访问 JupyterLab,用户名和密码就是你的 Linux 用户名和密码。
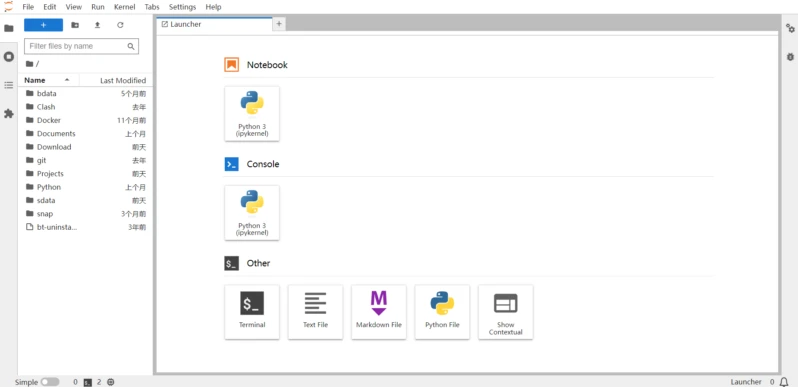
登录后目录是你的用户根目录,不仅可以管理文件、编写代码,还可以在线使用终端,就如同一个完整的 IDE。
